Introduction
We rely on the internet for almost everything now. Whether you are running a home lab, a small business office, or just have a household that panics when Netflix buffers, losing your primary internet connection is a major headache.
If you are already running OPNsense, you have enterprise-grade failover capabilities right at your fingertips. You just need a second internet source.
In this guide, we are going to set up a robust Multi-WAN failover system. We will use your existing primary internet connection (fiber/cable) and add a 4G/LTE backup using the super-reliable Teltonika TRB140 gateway.
Why the Teltonika TRB140?
While you could use a cheap USB 4G dongle, they are notoriously flaky. They overheat, disconnect randomly, and driver support in FreeBSD (the OS underneath OPNsense) can be hit-or-miss.
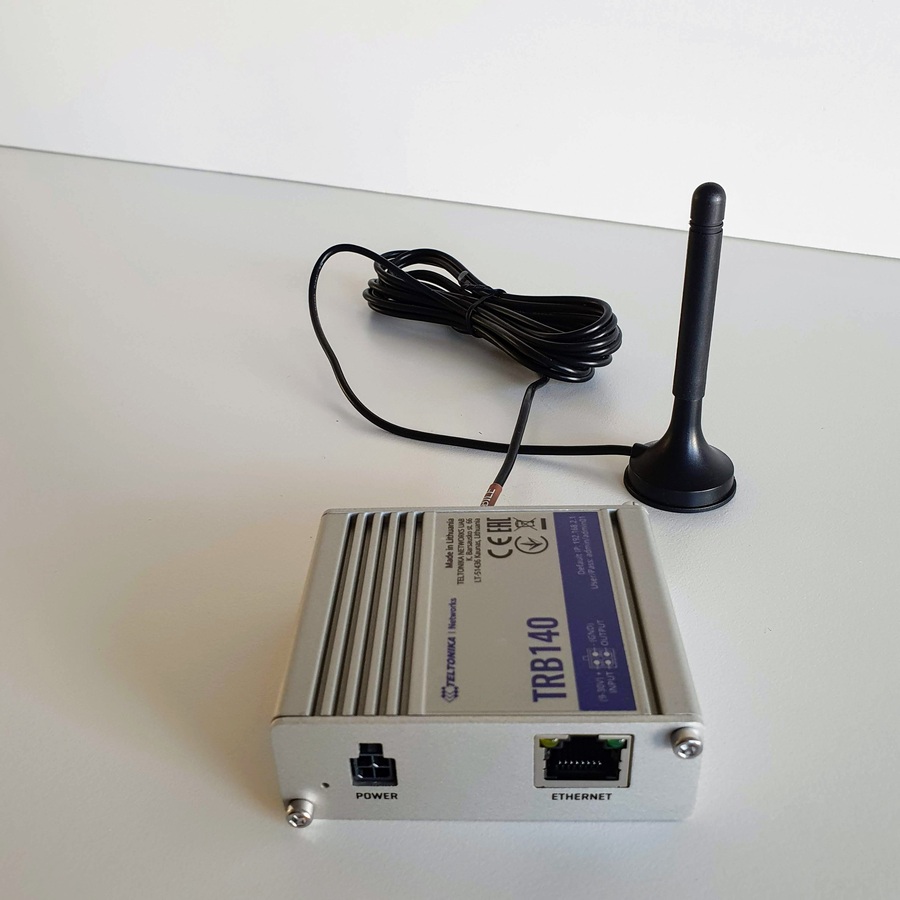
The Teltonika TRB140 is an industrial LTE Cat 4 gateway. It connects via Ethernet, meaning no driver issues. It’s designed to run 24/7 in harsh environments. Most importantly, it supports IP Passthrough (Bridge Mode), which is crucial for avoiding “Double NAT” issues and ensuring OPNsense handles the public IP address directly.
Prerequisites
Before we start, ensure you have the following:
- OPNsense Firewall: Running and configured with a primary WAN and LAN. You need at least one free physical Ethernet port (e.g.,
igb2,em2, etc.). - Teltonika TRB140: With power adapter and LTE antennas attached.
- A SIM Card: An active data SIM with a known APN (Access Point Name). Warning: Keep an eye on your data caps when running on backup!
- Ethernet Cable: To connect the TRB140 to OPNsense.
Phase 1: Configuring the Teltonika TRB140
We need to configure the TRB140 just enough so that it connects to the mobile network and passes that connection straight through its Ethernet port without doing any routing itself.
- Insert SIM and Power Up: Insert your SIM card into the TRB140 and power it on. Wait for the mobile signal LEDs to stabilize.
- Initial Connection: Connect your computer’s Ethernet port directly to the TRB140’s Ethernet port.
- Login: Open a browser and go to
192.168.2.1(the default IP). Log in (admin/admin01 usually, you will be forced to change this). - Setup Wizard: Run through the initial setup wizard to set your time zone and ensure the mobile interface connects. If it doesn’t connect automatically, you may need to enter your carrier’s APN located under Network -> Interfaces -> General (Mobile).
- Enable Passthrough Mode (Crucial Step):
- Navigate to Network -> Interfaces.
- Edit the Mobile interface.
- Change the Mode from NAT to Passthrough.
- Ensure the “Passthrough to interface” is set to the LAN Ethernet port.
- Optional but recommended: Sometimes you need to specify the MAC address of the OPNsense port you will be connecting to. For now, try leaving it blank; the TRB140 usually detects the first device plugged into its LAN port.
- Click Save & Apply.
Note: Once passthrough is enabled, you will lose easy access to the TRB140 web UI because it is no longer acting as a router with a local IP of 192.168.2.1. It is now a transparent bridge.
Phase 2: Physical Connections
Now that the modem is ready, let’s hook it into the firewall.
- Disconnect your computer from the TRB140.
- Connect an Ethernet cable from the TRB140 LAN port to your chosen free port on the OPNsense box (e.g.,
igb2).
Phase 3: Configuring the OPNsense Interface
We need to tell OPNsense that this new port is a second WAN connection.
- Log into your OPNsense Admin UI.
- Navigate to Interfaces -> Assignments.
- At the bottom, where it says “New interface”, select the physical port you connected the TRB140 to (e.g.,
igb2) and click the + button. - It will likely be named
OPT1orOPT2. Click on its name to edit it. - General Configuration:
- Enable Interface: Checked.
- Description: Give it a name, like
WAN2_4G. - IPv4 Configuration Type: DHCP. (Because the TRB140 is in passthrough mode, it will pass the carrier’s IP settings via DHCP to this interface).
- IPv6 Configuration Type: None (unless your carrier supports it and you want to configure it).
- Save and Apply Changes.
Checkpoint: Go to the OPNsense Dashboard/Lobby. You should see the WAN2_4G interface get an IP address. It might be a CGNAT private IP (like 10.x.x.x or 100.x.x.x) depending on your mobile carrier. This is normal.
Phase 4: Gateway and Monitor IP Setup
OPNsense needs to know how to determine if an internet connection is actually working. If we just monitor the TRB140 itself, the connection might look “up” even if the cellular tower has lost internet connectivity.
- Navigate to System -> Gateways -> Single.
- You should see a new gateway that was automatically created when you enabled DHCP on WAN2_4G. It usually has “GW” in the name. Click the pencil icon to edit it.
- Edit Gateway:
- Gateway name: Rename it something clearer if you wish (e.g.,
GW_WAN2_4G). - Monitor IP: This is critical. Do not leave this blank. Enter an external, highly available DNS server. Good choices are
1.1.1.1(Cloudflare) or8.8.8.8(Google). Note: Ensure your primary WAN gateway is monitoring a different IP (e.g., if WAN1 monitors 8.8.8.8, have WAN2 monitor 1.1.1.1).
- Gateway name: Rename it something clearer if you wish (e.g.,
- Click Save and Apply Changes.
Checkpoint: Look at the gateway status on the dashboard. You should see both gateways showing green “Online”.
Leave a Reply